Welcome to my latest project! As part of my current assignment for MTU, I’ve documented the step-by-step process of designing and decorating a bespoke birthday cake.
While I usually host my media directly on my Instagram / Facebook, blog, I am linking this video through my platform today to ensure the best viewing quality. You can watch the full process in the video below!
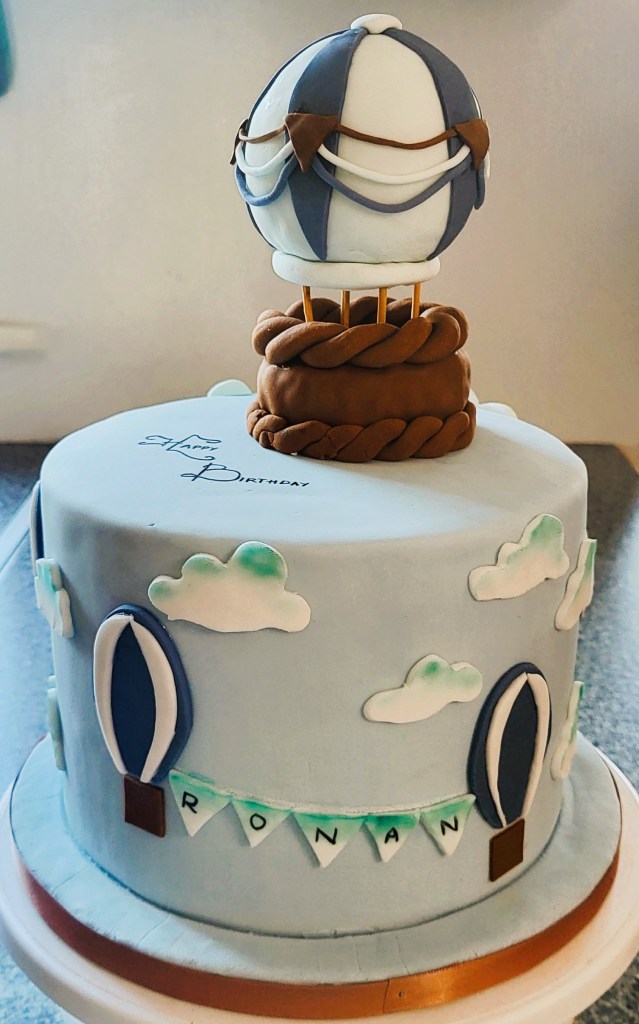
In the video, I take you through the journey of creating a Hot Air Balloon themed cake for a special birthday. Here is a breakdown of the technical steps involved:
- The Foundation. Starting with a light and fluffy sponge (I will be posting the recipe for that later). Best spent money, a cake levelling tool. Perfectly levelled sponge every time before assembly ensures a great end result.
- Structural Frosting. I used a Swiss Meringue Buttercream (which i will include in my next post) filling and a crumb coat to create a stable base for the foundation. Ensuring you have a good turntable for this task helps for an even and faster coat (Make sure to put a dab of cream under your first layer of sponge, it will stop it from moving while decorating)
- Assembly. Once I have layered the cake with cream and crumb coated the cake, (it’s a thin later of crem to lock in the crumbs) and chilled it, I made sure I’ve inserted a plastic dowels in the centre. That will ensure the stability of the cake and any problems with transportation. If the cake has more then 4 sponge layers and is quite tall, I would sugest inseting another 2 dowels, all opposite each other, to form a triangle.
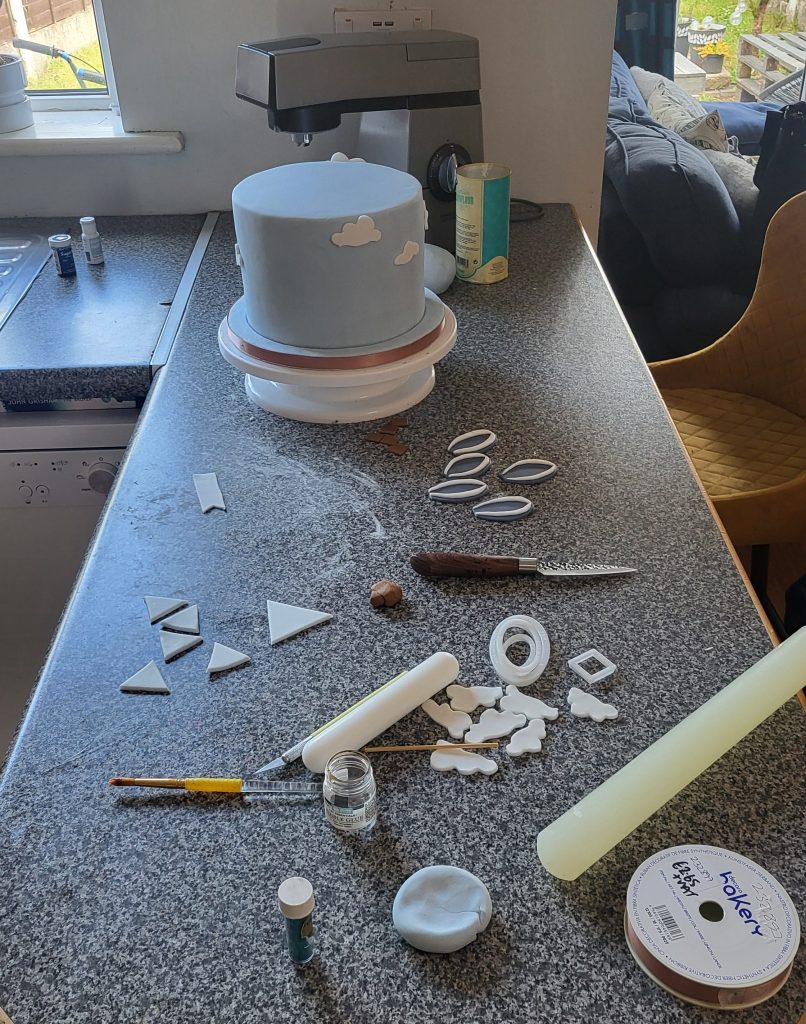
- Fondant Work. The cake is draped in a sky-blue fondant. My go-to fondant is Sugar Paste, you do have to work it this little bit harder to make it playable but the results are great. It has a great stretch and doesn’t break that easily, comparing to some other fondants I’ve worked with in the past, and is has a fantastic smooth finish. I hand-cut the clouds and decorative banners to give it a whimsical , “Up in the clouds” feel.
- The Topper. The centerpiece is a hand crafter 3D hot air balloon, completed with intricate rope detailing and a striped canopy. I made sure to put a supportive dovel through the center of the ballon backet and the cake so it wouldn’t “fly away”. I’ve put an additional two dowels in the cake under the ballon base to make sure it wouldn’t sink in the delicake cake.
- Final Touches. Personalised lettering for “Ronan”, I liked the idea of writing it on the banner, and finishing “Happy Birthday” details.
This projesct was a fantastic way of practicing precisionin fondant modeling and colour blending. Balancing the weight of the ballon topper while maintaining the cakes’s structural integrity was a rewarding challenge!
Thank you for visiting my page! Id love to hear you thoughts on this designin the comments bellow.

Leave a comment